Faults
Despite the considerable efforts made by DayStar Robotics engineers during the design and manufacturing process, unexpected issues may still inevitably arise during actual operation. When problems occur, they are communicated to operators, developers, and other equipment through fault alerts.
Faults can vary in type and origin. Current fault information can be accessed via the APP or SDK.
System Faults
System faults indicate hardware or software malfunctions. These include fault sources and fault codes, which can be communicated to users through the APP or SDK and are recorded by cloud services when Internet is availbale. To resolve these faults, please following the specific solutions corresponding to each fault code.
Behavioral Faults
Behavioral faults indicate that the robot is unable to execute a particular command. This typically means the robot's current state do not permit the execution of the command or the robot is currently occupied.
- Not placed in the specified posture

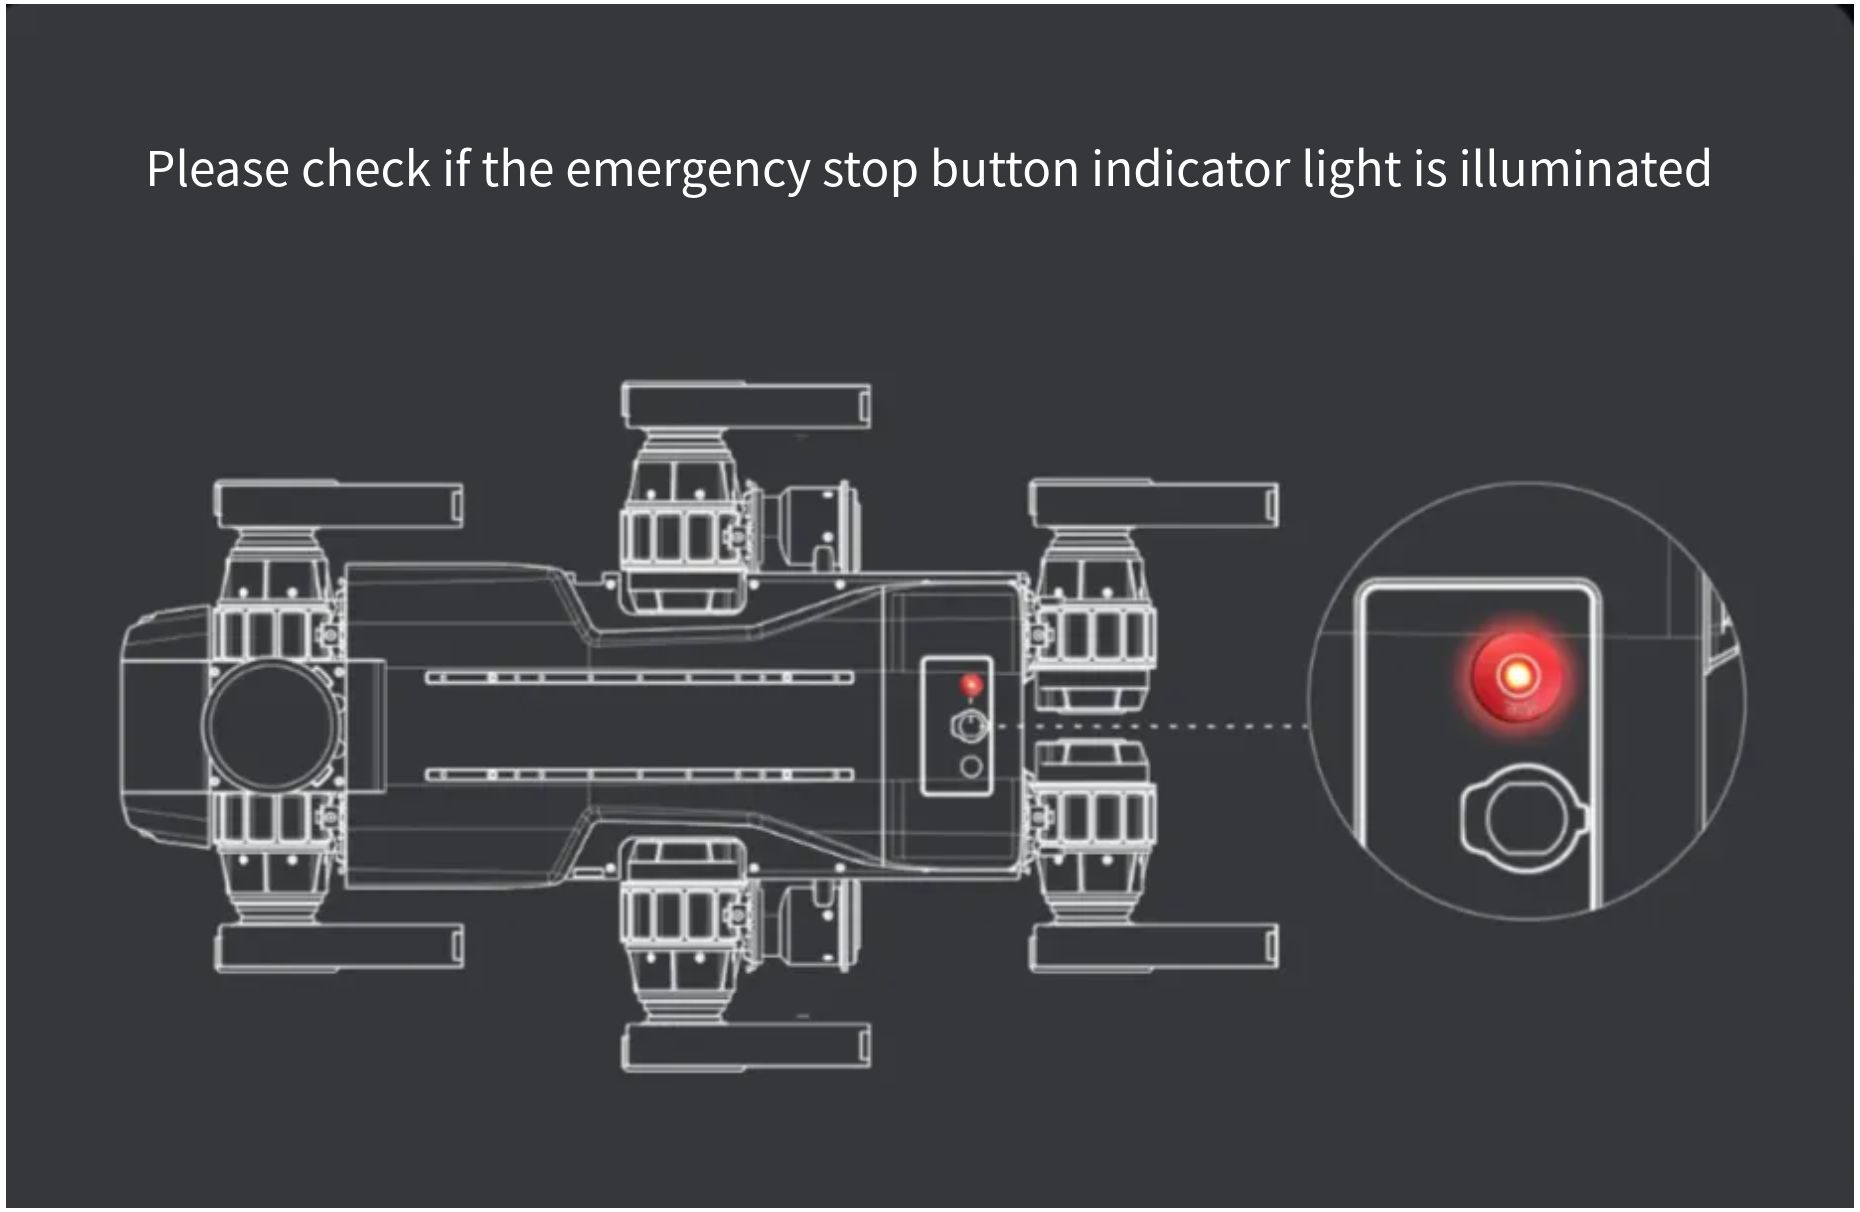
- Emergency stop button not illuminated
Application Faults
Application faults refer to issues with the App, such as the robot not being bound, connection failures, or network abnormalities.
Fault Recovery
Common warning will automatically clear once the conditions are resolved.
For special faults, such as motor protection or mainboard disconnection, a reboot is required to restore normal operation.

Status Code Definition Table
| Status Code | Status Description | Solution |
|---|---|---|
0xFFFFFFFF | Default value (Normal state) | |
0x00000001 | Index value below minimum limit | + Fault code out of bounds. Contact the original equipment manufacturer (OEM) engineer. |
0x00000002 | Index value exceeds maximum limit | + Fault code out of bounds. Contact the OEM engineer. |
0x00000003 | Driver enable failed | + Check: 1. Is the joint connected to the positioning system? 2. Any joint errors? 3. Is it charging at the station? 4. Is battery level below 5%? 5. Is it in emergency stop mode? |
0x00000004 | IMU data invalid; please check IMU connection | 1. Check if the physical connection between IMU and remote control is normal; 2. Contact the engineer to verify the IMU program. |
0x00000005 | Joint position out of range; driver cannot be enabled. Adjust joint position. | + Position the joints to the robot's standard prone posture. |
0x00000006 | Please restart the robot and re-calibrate joint positions | + Joint misalignment: Reset joints to restore. If position remains abnormal after multiple restarts, re-calibrate the robot's zero position. |
0x00000007 | Battery level too low! Emergency stop required | + Contact the manufacturer to check for faults in the battery/charging module. |
0x00000008 | Encoder error; joint re-initialization required | + Joint encoder fault: Re-initialize the robot's joints. |
0x00000009 | Emergency stop activated | + Check if the robot's emergency stop button/remote control's emergency stop button is pressed. |
0x0000000A | Crouching posture not standard; please adjust | + After each startup, reset the joints to the standard prone posture. |
0x0000000B | Driver enable timeout | + Check if the emergency stop button is pressed, if the robot's legs are in standard prone posture, or restart the robot. |
0x0000000C | Self-check failed; driver enable failed | + Abnormal joint/IMU data: Place the robot in standard prone posture and restart. |
0x0000000D | EtherCAT bus error; please check cable connections and drivers | + Check the corresponding joint's servo, or troubleshoot drive anomalies, then restart the robot. |
0x0000000E | EtherCAT master license not found | + Contact the manufacturer to inject genuine EtherCAT license into the robot. |
0x0000000F | EtherCAT master using invalid license | + Contact the manufacturer to inject genuine EtherCAT license into the robot. |
0x00000010 | Excessive EtherCAT frame loss causing emergency stop | + Troubleshoot EtherCAT joint wiring, restart the robot, and upload logs to the manufacturer for investigation. |
0x00000011 | In emergency stop; driver cannot be enabled | + Restore the emergency stop state. |
0x00000012 | Joint out of range; driver cannot be enabled | + Enable the robot only after placing it in the correct prone posture. |
0x00000013 | In emergency stop; operation failed | + The robot is currently in emergency stop mode; this operation cannot be performed. |
0x00000014 | Previous state transition not completed; current operation not allowed | + Try again later: The previous state switch is not yet completed. |
0x00000015 | Demo mode active; mode switching not allowed | + The robot is currently demonstrating actions; mode switching is unavailable. Please try again later. |
0x00000016 | Driver is disabled; operation not permitted | + Enable the robot first before operating. |
0x00000017 | Robot not in crouching posture; driver cannot be enabled | + Place the robot in the standard prone posture. |
0x00000018 | Joints not calibrated; driver cannot be enabled | + Perform zero-calibration for the robot's joints. |
0x00000019 | Encoder has been reset; re-calibration required | + Re-zero-calibrate the robot. |
0x0000001A | Runtime self-check failed; driver cannot be enabled | + Check if the robot's IMU/joint force sensor is normal. |
0x0000001B | Robot not in standing posture; operation not allowed | + Have the robot stand up before performing the current operation. |
0x0000001C | Current gait does not allow enabling demo mode | + Have the robot stand up, switch to walking/running mode, then start the demo action. |
0x0000001D | Driver enable failed, resulting in charging pile disconnection failure | + Check if the emergency stop button works, if battery level is below 5%, or if joints are faulty. |
0x0000001E | Current gait does not support docking for charging | + Switch to walking/gait mode before powering on. |
0x0000001F | Docking for charging failed | + Check if the charging station is powered, if the robot is seated correctly, and if the relay is properly activated. |
0x00000020 | Reinforcement learning mode not supported on current platform | + Do not switch to reinforcement learning gait. |
0x00000021 | Current state does not support switching to reinforcement learning mode | + Do not switch to reinforcement learning gait. |
0x00000022 | Robot joints not in standard crouching posture; driver enable failed | + Do not switch to reinforcement learning gait. |
0x00000023 | Severe joint error detected; robot must crouch | + Place the robot in standard prone posture, record logs for the manufacturer, restart, and use only after manufacturer confirmation. |
0x00000024 | Robot in hard emergency stop; software cannot recover. Please check hardware emergency stop switch. | + Release the robot's hard emergency stop button. |
0x00000025 | Charging station unable to shut down; exit charging timeout. Please wait! | + Try multiple times (max 10 minutes). If failed, check if the robot/charging station relay is properly closed, and report to the manufacturer. |
0x00000026 | RPS client abnormal | + RPS sensor abnormal. Report to the manufacturer for resolution. |
0x00000027 | Battery level too low; robot not allowed to stand up | + Charge the robot; use it only when battery level ≥20%. |
0x00000028 | Driver reset operation not supported on current platform | + The robot cannot update the driver currently. |
0x00000029 | FOE firmware upgrade not supported by driver on current platform | + The robot cannot update the driver via OTC currently. |
0x0000002A | Robot is enabling; driver reset prohibited | + First have the robot lie prone, disable it, then perform the driver reset operation. |
0x0000002B | Robot is charging; does not respond to stand-up command | + To make the robot stand up, press the twist-release button. |
Joint Fault Code Definition Table
| Fault Code | Fault Description | Solution |
|---|---|---|
0xFFFFFFFF | Default value (Normal state) | |
0x10000001 | Failed to clear driver error 7303 | + Please restart the robot, or after disabling the joints, initialize them (takes ~20 minutes). Then re-zero-calibrate the robot and restart it for use. |
0x10000002 | Driver error detected; please check bus status word | + Check the EtherCAT wiring before and after the faulty joint of the robot. |
0x10000003 | Driver overvoltage | + Please restart the robot. If the issue persists, contact the manufacturer. |
0x10000004 | Driver in STO state; please release emergency stop button | + Release the hardware emergency stop button. |
0x10000005 | Joint position out of range | + Disable the joints, then position the legs in the normal prone posture before use. |
0x10000006 | Joint velocity exceeds limit | + Reduce the robot’s walking speed, then restart the robot for use. |
0x10000007 | Joint torque exceeds limit | + Reduce the robot’s load, handle it gently, then restart the robot for use. |
0x10000008 | Joint rotation exceeds one full revolution | + Disable the joints, position the legs in the normal prone posture, then restart for use. |
0x10000009 | Sudden change in joint position | + Record the faulty joint number and send the log to the manufacturer together. |
0x1000000A | Torque sensor data abnormal | + This is usually a false alarm. Ignore it if the robot walks normally. If it limps, report to the manufacturer for resolution. |
0x1000000B | Encoder BisEr fault | + Please restart the robot, or after disabling the joints, initialize them (takes ~20 minutes). Then re-zero-calibrate the robot and restart it for use. |
0x1000000C | Encoder BisWn fault | + Please restart the robot, or after disabling the joints, initialize them (takes ~20 minutes). Then re-zero-calibrate the robot and restart it for use. |
0x1000000D | Encoder battery fault | + Replace the encoder battery (current voltage is estimated to be below 3.6V). After replacement, restart the robot, disable the joints, initialize them (takes ~20 minutes), then re-zero-calibrate the robot and restart it for use. |
0x1000000E | Joint motor fault (refer to sub-fault code for details) | + Record the faulty joint number and upload the log to the manufacturer for analysis. Then restart the robot; it can usually be used continuously. |
0x1000000F | Joint driver fault (refer to sub-fault code for details) | + Record the faulty joint number and upload the log to the manufacturer for analysis. Then restart the robot; it can usually be used continuously. |
0x10000010 | Joint MOSFET temperature too high | + Turn off the robot, let it rest for at least 20 minutes before reuse. Ensure proper heat dissipation for the robot. |
0x10000011 | Joint driver temperature too high | + Turn off the robot, let it rest for at least 20 minutes before reuse. Ensure proper heat dissipation for the robot. |
0x10000012 | Joint motor temperature too high | + Turn off the robot, let it rest for at least 20 minutes before reuse. Ensure proper heat dissipation for the robot. |
0x10000013 | Failed to clear emergency stop for joint | + Record the faulty joint number and upload the log to the manufacturer for analysis. Then restart the robot; it can usually be used continuously. |
Notes:
- The Joint Index parameter in the error information interface represents the joint number.
- Specific faults of the joint motor and driver can be further diagnosed by reading the corresponding sub-fault code.
- Sub-fault codes with a value of
0xFFFFFFFF, or joint indices with a value of-1, can be ignored.